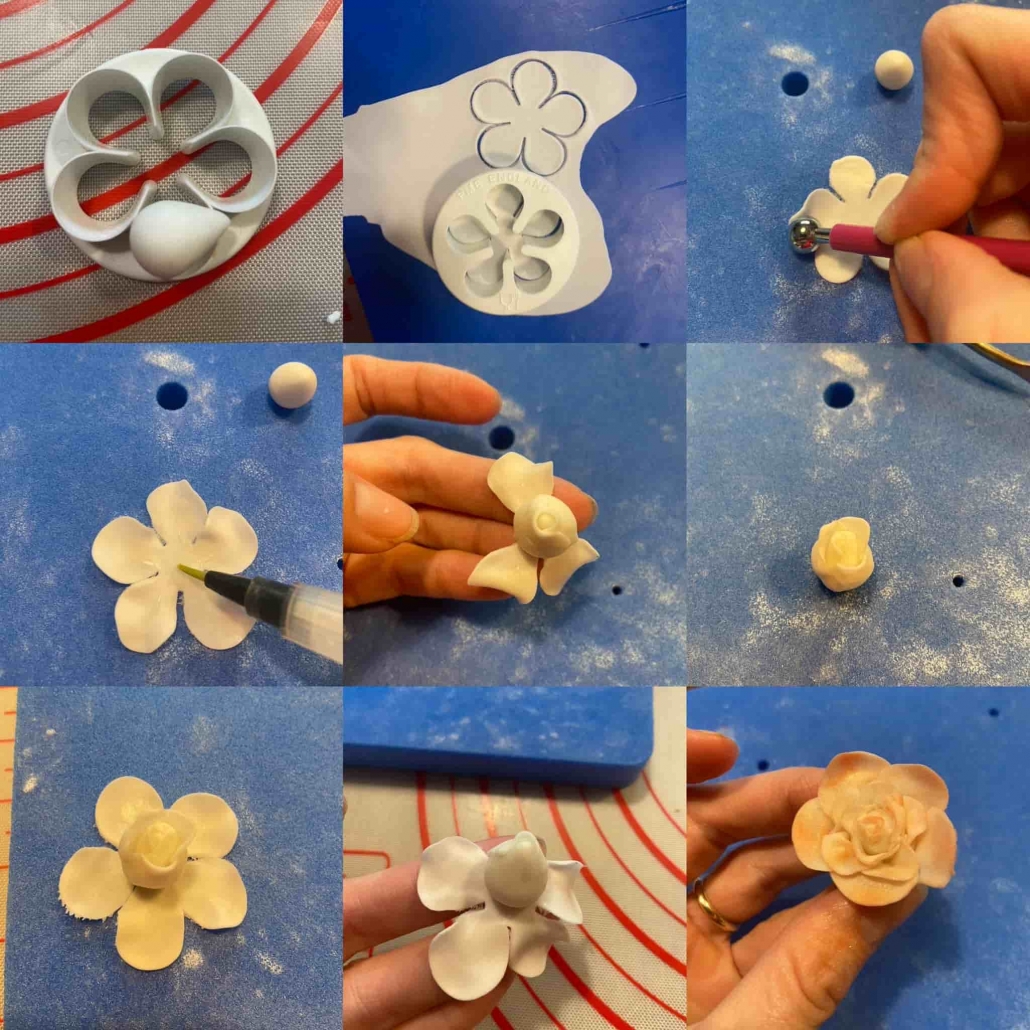
Work the modelling sugar paste with your hands to soften it and make a ball, thin it on one side to form a drop of the size of the petal of the cutter that you have chosen (in my case 5 cm).
Using a flower board, roll out the remaining modelling sugar paste with a rolling pin at 0.8 mm, obtain a flower with the 5-petal cutter.
Place the flower on the shaping foam (flower mat) and thin the edge of the petals with a ball tool.
Wet the centre of the flower with a reservoir pen, place the drop in the centre of the flower and fix, take the first petal and wrap it tightly around the drop to cover the tip, do the same with the opposite petal, then adhere the other three petals, making sure that the left edge of the petal is always under the previous petal.
Using a flower board, roll out the remaining modelling sugar paste with a rolling pin at 0,8 mm, obtain a flower with the 5-petal cutter.
Place the flower on the shaping foam (flower mat) and thin the edge of the petals with a ball tool.
Wet the centre of the flower with a reservoir pen, place the bud in the centre of the flower and fix, take the petals and wrap them making sure that the left edge of the petal is always under the previous petal, modelling the petals to give more naturalness to the rose.
Proceed in the same way with another layer of petals cut with a larger cutter

 Tutorial Winnie the Pooh


-min")
-min")
-min")
-min")
")
-min")
-min")
-min")
Lascia un Commento
Vuoi partecipare alla discussione?Fornisci il tuo contributo!